Email invoices and credit notes (from Invoicing)
This explains how to email invoices and credits notes created in the Invoicing module only. To email invoices and credit notes created from Sales Orders, see Email invoices (from sales orders).
How to
Set up email layouts
Before you can email your invoices or credit notes, you need to choose the layout you want to use. All invoices or credit notes that are emailed at the same time will use the same layout. This layout must have the correct email settings applied.
Sage 200 has a set of default layouts that you can use 'out of the box'. If you want to use customised layouts, we recommend that you make changes to these defaults.
-
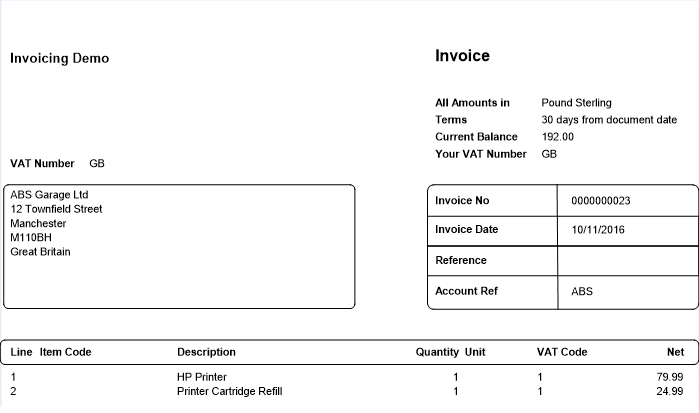
SOP Invoice (Email Plain Paper), SOP Credit Note (Email Plain Paper): With borders to define the sections.
-
SOP Invoice (Email), SOP Credit Note (Email): Without borders to define the sections.
-
SOP Invoice Payment Service Provider (Email Plain Paper), SOP Invoice Payment Service Provider (Email): Designed for use with both Sage Invoice Payments and Opayo (formerly Sage Pay). A Pay Now button is added to each type of invoice layout.
To choose the layout:
-
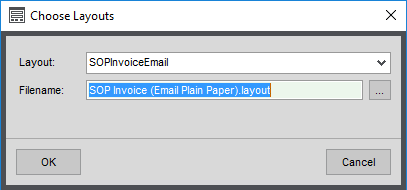
Choose one of the following from the Layout drop-down list:
- SOPInvoiceEmail
- SOPCreditNoteEmail
-
Click the Browse button next to Filename and choose the layout you want to use.
- Default layouts can be found here: default > layouts
- Customised layouts can be found here: custom > layouts
Email invoices and credit notes
Emailing invoices and credit notes is the same as printing them.
You can't change the contents of an invoice or credit note once it's been emailed. You can only change the customer's address or the customer's order number.
You can't email more than 50 invoices or credit notes at a time.
Open: Invoicing > Invoicing List.
- Select the invoices and credit notes you want to email and click Email
 .
. -
The invoices and credit notes are sent to the Drafts folder of your email provider so you can check them before sending.
The emailed invoices or credit notes will have a status of Printed.
Email reprinted invoices and credit notes
You can only use the Email option from the list to email invoices and credit notes for the first time. This is because this process also changes the invoice status to Printed.
If you need to resend a copy of the invoice, you'll need to reprint it first, then email it via the spooler or preview options. This will add Copy to the resent invoices and credit notes.
-
Make sure you've set Sage 200 to send documents to the spooler or preview, rather than straight to the printer.
-
Reprint the invoice or credit note.
Open: Invoicing > Invoicing List, then select the invoice or credit note and select Reprint.
- From the spooler, select the invoice and click Email.
- From the preview screen, click Email.
Save invoices or credit notes to cloud document storage
You can set up Sage 200 to save invoices and credit notes to cloud document storage when you print (or email) them, so that they can be viewed by everyone.
If the invoice or credit note has been printed (or emailed) and saved to your cloud document storage, you can view it in PDF format.
Open: Invoicing > Invoicing List, then select a single invoice or credit note and click View in Document Storage.
Open: Customers > Customer List, then select the customer and click View in Document Storage.
- The customer's folder is displayed in cloud document storage. The Invoice and Credit Note folders contain the appropriate documents for the customer.
See Save printed documents to cloud document storage.
Useful info
About emailing your invoices
You can't email more than 50 invoices at a time. If you do, the emails will not be generated but the invoice or credit note status will be changed to Printed.
-
You can only email Invoices created in the Invoicing module using this method. These invoices must have a status of Draft.
To email invoices created from Sales Orders, see Email invoices (from sales orders).
-
There are several different layouts that you can use, but you can only email using one layout at a time. You can't set different email layouts for different customers, as you can with printed invoices.
-
You can customise the email layouts, e.g. add your company logo.
-
If you're emailing more than one invoice to the same customer, your invoices are combined into a single PDF.
-
If you're using Invoice Payments or Opayo (formerly Sage Pay), you can include a Pay Now button on invoices and email them to your customers. To do this, just use one of the Pay Now email layouts. If you send more than one invoice to the same customer, each invoice is attached to the email separately. See Send invoices with Invoice Payments (Pay Now) or Use Pay Now with Opayo (formerly Sage Pay).
-
The invoice or credit note is sent to the email address set as the contact on your customer's account.
-
Once the email is generated, the invoice or credit note status is changed to Printed.
Using customised email layouts
The default layouts we have provided have all the correct email options applied. If you want to use a customised layout with your own logo etc. we recommend that you make changes to one of the default layouts.
As long as you amend the default layout that you've set to use, and save it with the same name in the Custom folder, your custom layout will be used automatically.
Open: ![]() Tools > Run Sage Report Designer.
Tools > Run Sage Report Designer.
-
Enter the email address and password you use to log into Sage 200.
-
Go to the File Explorer, and browse to default > layouts folder.
- Double-click on the document layout you want to customise.
-
Make your changes to the layout.
Tip: For help working with reports, watch our reports videos and use the help supplied with Report Designer.
-
When you have finished go to the File menu and select Save As.
- Choose where to save the layout:
- If you want to use the new layout for all companies, save it in the custom > layouts folder.
- If the layout is specific to a single company, save it in the company > layouts folder.
-
Click the Close button at the top of the document window.
Which email providers can I use?
If you use any of the following to send and receive emails, the invoice layouts will already have the correct settings:
-
Microsoft Outlook - to find out which versions of Microsoft Office you can use, see System requirements for Sage 200 Standard.
-
Windows Live Hotmail.
-
Yahoo Mail.
-
Yahoo Plus Mail.
If you're not using one of email providers listed above, you'll need to enter the SMTP settings for your provider.
Basic authentication will be retired for Outlook.com and Gmail in September 2024. This means if you use SMTP to send emails using Outlook.com or Gmail, you may need to re-configure your email service or Sage software.
To find out more about the authentication changes, see:
Open: ![]() Tools > Run Sage Report Designer.
Tools > Run Sage Report Designer.
-
Go to the File Explorer, and browse to default > layouts folder.
- Double-click on a document layout.
- Select Tools > Options | Email setup.
- Select Internet Mail (SMTP) and click Configure.
- Choose your email provider, or click Custom.
- Enter the details for your email provider.
Note: You should be able to obtain these details from your IT administrator, or alternatively from your email provider's website.


